How to Clean a Computer Keyboard - Step-by-step Guide
This guide is written for such times so that you can avoid buying a replacement keyboard and save money in the long term.
August 12, 2023 18:51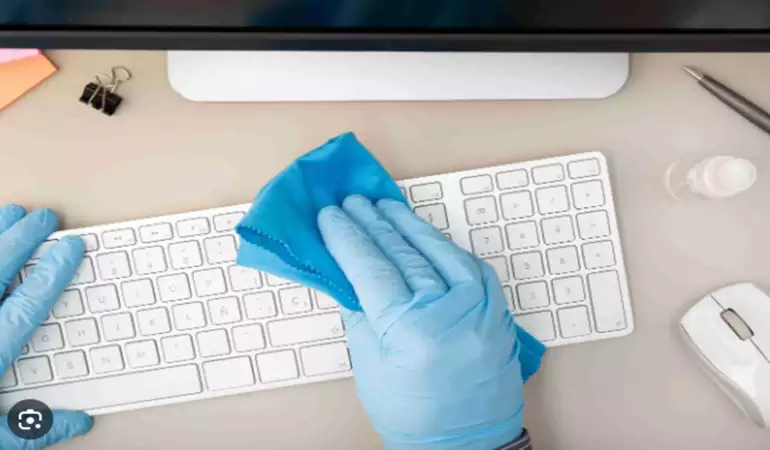
In the hustle and bustle of our digital lives, our computer keyboard often bears the brunt of our daily activities. A clean keyboard, however, is not just about aesthetics; it's a crucial component of a healthy and efficient workspace. Regular keyboard cleaning offers an array of benefits that extend beyond mere cleanliness.
In this guide, we will explore the significance of a tidy keyboard, delve into the advantages of consistent cleaning practices, and provide you with a comprehensive overview of the step-by-step cleaning process.
Let's embark on a journey to ensure your keyboard remains a hub of productivity and a canvas of cleanliness.
Preparing for Keyboard Cleaning
Before diving into the process of cleaning your keyboard, it's important to get everything ready to ensure a thorough and effective cleaning session. Gathering the right supplies and taking a few precautions will help make the process smoother and more successful.
1. Collecting the Essential Supplies
To get started, assemble the following items that are essential for a successful keyboard cleaning session:
* Microfiber Cloth: This soft and gentle cloth is perfect for wiping away dust, grime, and fingerprints from your keyboard's surface.
* Compressed Air Can: A can of compressed air is incredibly useful for dislodging debris from between the keys and hard-to-reach areas. It's an efficient way to blast away dust particles.
* Cleaning Solution (Isopropyl Alcohol): Isopropyl alcohol is a great cleaning agent that effectively dissolves oils, sticky residue, and germs without damaging the keyboard's components.
* Cotton Swabs: These small, precise tools are excellent for cleaning crevices, corners, and other tight spaces that are challenging to access with a cloth.
* Keycap Puller (if applicable): If your keyboard allows for the removal of individual keycaps, a keycap puller is handy for taking off the keys for a more thorough cleaning.
2. Unplug or Turn off the Keyboard/Computer
Before you start the cleaning process, it's crucial to either unplug the keyboard or turn off the computer. This step serves a dual purpose:
* Prevents Accidental Inputs: Unplugging the keyboard or turning off the computer ensures that no accidental key presses or inputs occur while you're cleaning. This not only enhances your cleaning efficiency but also prevents any unintended actions on the computer.
* Safety First: Ensuring the keyboard is disconnected from power minimizes the risk of electrical mishaps or damage to the keyboard during the cleaning process.
By taking a moment to prepare and gather the necessary supplies, as well as unplugging or turning off the keyboard, you're setting the stage for a successful and hassle-free cleaning experience. This simple yet essential preparation ensures that you can clean your keyboard effectively and safely, extending its lifespan and maintaining its optimal performance.
Step-by-Step Guide on How to Clean Your Dirty Keyboard
Prepare your working station by first laying out a towel or cloth on a table or other flat surface. The dirt you clean from the keyboard will fall on this towel, which you’ll fold up later and throw away the debris.
Wear the items on your PPE list and follow these steps:
Step 1: Ensure your computer is switched off.
Step 2: Unplug the keyboard and place it on the towel to clean.
Step 3: Turn the keyboard upside down and tilt it from side to side to remove any loose particles caught between keys. Shake it gently to make sure no more particles are left.
Step 4: Aim the can of compressed air at an angle while pointing down toward the keyboard and blow off the fine dust that remains on the keyboard. It is important that you maintain an angle or else risk discharging refrigerants onto the keyboard.
Step 5: Use the portable vacuum cleaner to suck all the dust that the can of compressed air didn’t blow off.
Step 6: Using rubbing alcohol, moisten the cloth and gently wipe the whole keyboard’s surface.
Step 7: For even more thorough cleaning, use a cotton swab moistened in the rubbing alcohol to reach the spaces between keys.
While these steps will leave your keyboard clean and dust-free, you are free to improvise the process according to your keyboard’s cleaning needs.
If you’re cleaning your laptop’s keyboard, it’s not a good idea to shake it. Modern laptops won’t be affected by a little shaking, but doing it every time you’re cleaning may affect some of the internal components. Instead, you can tap it gently while holding it upside down to dislodge the little crumbs beneath the keys.
Bearing in mind that your keyboard could be a source of numerous disease-causing bacteria, it is wise to plan regular cleaning and disinfecting.
Basic Cleaning Steps
Maintaining the cleanliness of your keyboard is essential for optimal performance. Follow these simple yet effective techniques to ensure your keyboard stays in top condition.
Shake and Tap Method
One of the easiest ways to remove loose debris such as crumbs and dust from your keyboard is the Shake and Tap Method:
* Turn the Keyboard Upside Down: Gently flip your keyboard upside down, allowing gravity to assist in dislodging any unwanted particles.
* Gentle Shaking: Give your keyboard a gentle shake to encourage loose debris to fall out from between the keys.
* Light Tapping: To further dislodge any trapped debris, lightly tap the back of the keyboard. This technique helps ensure that even the tiniest particles are dislodged.
Compressed Air Cleaning
Dust and dirt can accumulate in hard-to-reach areas between the keys. Here's how you can effectively clean these spaces using compressed air:
* Choose the Right Compressed Air Can: Opt for a can of compressed air designed for electronics cleaning.
* Proper Technique: Hold the can of compressed air upright to prevent any moisture from escaping. This ensures a safe and efficient cleaning process.
* Blow Away Dust and Particles: Gently insert the nozzle between the keys and in other tight spots, and use short bursts of air to blow away dust and particles. Make sure to keep the nozzle at a suitable distance to avoid damaging the keys.
By incorporating these basic cleaning steps into your routine, you can maintain a clean and functional keyboard that enhances your typing experience. Regular cleaning not only prolongs the lifespan of your keyboard but also contributes to a more hygienic workspace.
Removing and Cleaning Keycaps
When it comes to keeping your keyboard in top-notch condition, a thorough cleaning routine is essential. One key aspect of this routine involves removing and cleaning keycaps, especially in the case of mechanical keyboards. Whether you're an avid typist or a casual user, the accumulation of dust, grime, and debris can affect your typing experience and the overall longevity of your keyboard.
Why Remove Keycaps?
Mechanical keyboards, known for their tactile feel and audible clicks, often have individual keycaps that can be removed. This becomes particularly necessary when dirt or residue accumulates underneath the keycaps, affecting the key's responsiveness and causing discomfort while typing. By periodically removing keycaps, you can access the hard-to-reach areas and ensure a thorough cleaning process.
Removing Keycaps with Care
Before diving into the removal process, exercise caution. Avoid applying excessive force that might damage the keycaps or the switches beneath. To ensure a safe removal, it's recommended to use a keycap puller – a handy tool designed for this purpose. This tool provides leverage without causing any harm to the keyboard's delicate components.
Cleaning Keycaps and Keyboard Base
Once you've successfully removed the keycaps, it's time to bring back their shine and tackle the keyboard base. Here's how:
1. Keycaps Cleaning: Begin by submerging the keycaps in a mixture of warm soapy water. Gently scrub each keycap using a soft brush, cloth, or sponge. Rinse them thoroughly with clean water and allow them to air dry completely before reattaching.
2. Keyboard Surface: For the keyboard base, create a cleaning solution by mixing equal parts of isopropyl alcohol and water. Dampen a microfiber cloth with this solution. Carefully wipe down the surface of the keyboard, paying special attention to areas with visible stains or stickiness.
3. Precision Cleaning: To ensure no nook or cranny is left untouched, use cotton swabs dipped in the cleaning solution. Glide the swabs around and between the keys, gently removing dirt and grime. This step helps you achieve a meticulous cleaning even in tight spaces.
By following these steps, you can maintain a pristine keyboard that not only looks appealing but also functions optimally. A clean keyboard not only enhances your typing experience but also prolongs the life of your valuable device. Remember to undertake this cleaning routine periodically to keep your workspace tidy and your keyboard performing at its best.
Dealing with Stubborn Stains
For those stubborn stains that just won't budge, here's a practical solution that can save the day. Create a mixture of isopropyl alcohol and water in equal parts (1:1 ratio) and apply it using a gentle touch of a cotton swab. This potent concoction works wonders on those tougher stains that regular cleaning might not fully tackle. However, it's crucial to exercise caution when using liquids on your keyboard to avoid potential damage.
Drying and Reassembling
Proper drying is the key to successfully restoring your keyboard's functionality and appearance. Before even considering reassembling the keyboard or putting it back to use, it's imperative to ensure every component is thoroughly dried. This step cannot be stressed enough.
Take your time to air dry both the keycaps and the keyboard itself. Allowing them to breathe for a few hours ensures moisture is completely eliminated. Alternatively, you can use a soft, absorbent cloth to gently wipe off any remaining dampness.
To avert any possible damage or malfunction, it's crucial to be absolutely certain that every part is impeccably dry before moving forward with reassembly. Rushing this step could undo the effort you've invested in cleaning your keyboard and potentially lead to future issues. So, exercise patience and caution throughout this process to guarantee your keyboard's optimal performance and longevity.
Maintenance Tips
When it comes to keeping your keyboard in top-notch condition, a little maintenance can go a long way. Follow these simple yet effective tips to ensure your keyboard stays clean and functional for the long haul.
1. Regular Cleaning Schedule: Establishing a routine cleaning schedule is paramount in preventing the buildup of dirt and debris on your keyboard. Regularly remove dust, crumbs, and other particles that tend to accumulate over time. This not only keeps your keyboard looking pristine but also maintains its optimal performance.
2. Keyboard Covers and Dust-Proof Mats: Simplify your future cleaning endeavors by using keyboard covers or dust-proof mats. These protective accessories act as barriers against dust, spills, and grime, significantly reducing the amount of dirt that finds its way into the crevices of your keyboard. This proactive step not only enhances cleanliness but also prolongs the life of your keyboard.
3. Mindful Consumption: It's tempting to munch on snacks or sip beverages while working, but doing so over your keyboard increases the likelihood of accidental spills and crumbs finding their way between the keys. By avoiding eating or drinking directly over your keyboard, you minimize the risk of damage and the subsequent need for thorough cleaning.
Conclusion
In conclusion, by implementing these straightforward maintenance practices, you're setting the stage for a cleaner, more efficient keyboard experience. Recapitulating the key points of our step-by-step guide:
1. Regular cleaning routines keep dirt and debris at bay, ensuring optimal keyboard functionality.
2. Protective accessories like keyboard covers and dust-proof mats preemptively shield your keyboard, reducing cleaning demands.
3. Practicing mindful consumption away from the keyboard mitigates the chances of spills and crumbs causing harm.
Investing in the cleanliness of your keyboard translates to a host of benefits. Enhanced hygiene safeguards your health, while extending the lifespan of your keyboard saves you money in the long run. Additionally, a clean keyboard contributes to an improved typing experience, promoting both comfort and efficiency during your work or leisure sessions. So, embark on this journey of keyboard maintenance, and relish the rewards it brings!