How To Cancel Apple Subscription – Step-by-Step Guide
Discover the simplest way to cancel your Apple subscription on iPhone. This guide provides a quick, hassle-free process with step-by-step instructions.
January 07, 2024 12:54
Navigating the world of digital subscriptions can often be confusing, especially when it comes to managing your Apple subscriptions.
Whether you’re looking to streamline your monthly expenses or simply don't need a service anymore, this step-by-step guide will show you precisely how to cancel your Apple subscription in a few easy steps.
Understanding Your Apple Subscription
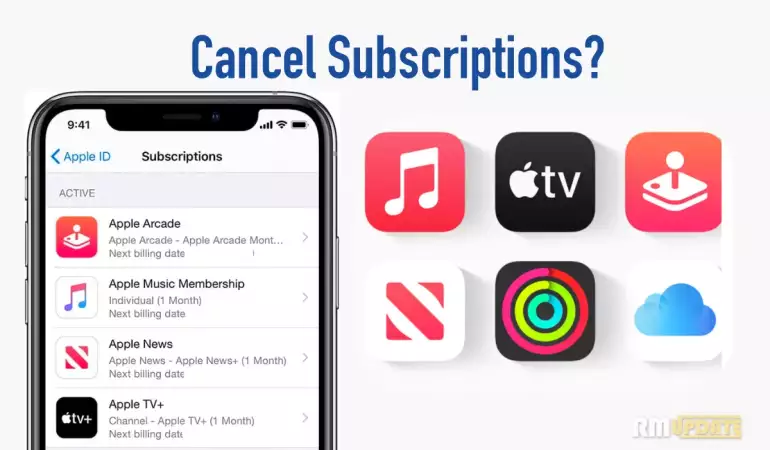
Before diving into the cancellation process, it’s important to understand what an Apple subscription encompasses. Apple subscriptions can include services like Apple Music, Apple TV+, Apple News+, and other services available via the App Store. These subscriptions are typically linked to your Apple ID, making them easily manageable under one account.
Reasons for Canceling Your Apple Subscription
Cancelling an Apple subscription can be a practical decision for several reasons. Understanding these reasons helps ensure you make an informed choice that best suits your digital lifestyle. Here's a brief overview:
Cost-Saving: One of the primary reasons for canceling subscriptions, including Apple's, is to save money. Monthly subscriptions can add up, and if you're not utilizing the service to its fullest, it might not be worth the cost.
Lack of Use: If you find yourself not using the Apple subscription services as frequently as you anticipated, canceling is a logical step. It's essential to regularly evaluate your subscription usage to ensure you're getting value for money.
Preference for Another Service: With the abundance of digital services available, you might find another service that better fits your needs or offers content that's more aligned with your interests.
Before deciding to cancel your Apple subscription, consider weighing the pros and cons. Reflect on how often you use the service, the benefits it offers, and whether there's a more cost-effective alternative that meets your needs. This balanced approach ensures you make a decision that's not only financially wise but also aligns with your digital consumption patterns.
Pre-Cancellation Checklist
Before proceeding with the cancellation of any service or subscription, especially related to Apple products, it's crucial to follow a simple yet essential pre-cancellation checklist. This step-by-step guide ensures a smooth and hassle-free cancellation process.
1. Know Your Apple ID and Password
Importance: Your Apple ID is your gateway to all Apple services. Before initiating any cancellation, make sure you know your Apple ID and password. This is crucial for accessing account settings and managing subscriptions.
Tips for Remembering: If you've forgotten your Apple ID or password, use Apple's recovery process to retrieve them. Keep your ID and password stored in a secure but accessible place for future reference.
2. Check Subscription Terms
Understanding Cancellation Policies: Each service or subscription has its own set of terms and conditions. It's important to read and understand these, especially the cancellation policies.
Looking for Fees or Terms: Some services may include cancellation fees or specific terms you need to be aware of. For instance, you might be obligated to continue the service until the end of the billing cycle or pay a fee if you cancel mid-term.
Where to Find This Information: Typically, this information is available in the subscription or service agreement, or under the terms and conditions section of the service’s website or user settings in your account.
By following this pre-cancellation checklist, you ensure a smooth transition away from your current subscription or service. Remember, being informed and prepared is the key to avoiding unexpected charges or complications during the cancellation process.
Step-by-Step Guide to Cancel Apple Subscription
Cancelling your Apple subscription is a straightforward process that can be done through various devices. Below is a comprehensive guide, broken down into simple steps to help you cancel your subscription with ease. Whether you're using an iPhone, iPad, Mac, or a web browser, these instructions will guide you through the process.
A. Cancelling via iPhone or iPad
Open Settings: On your iPhone or iPad, start by opening the 'Settings' app.
Access Your Apple ID: Tap on your name at the top of the Settings menu to access your Apple ID.
Subscriptions: Scroll down and select 'Subscriptions'. This will display all your current and past subscriptions linked to your Apple ID.
Select the Subscription: Find the subscription you want to cancel and tap on it.
Cancel Subscription: Scroll down and tap the 'Cancel Subscription' button. Confirm your choice if prompted.
B. Cancelling via Mac or Apple Computer
Open App Store: On your Mac, open the App Store.
Sign in to Your Account: Click on your account name at the bottom of the sidebar. If you're not already signed in, you will need to log in with your Apple ID.
View Information: Click on 'View Information' at the top of the window and sign in if asked.
Manage Subscriptions: Scroll to the 'Subscriptions' section and click on 'Manage'.
Choose Subscription to Cancel: Find the subscription you want to cancel and click 'Edit' beside it.
Cancel Subscription: Click 'Cancel Subscription' and confirm your decision.
C. Cancelling Through a Web Browser
Visit Apple's Website: Open your web browser and go to Apple's subscription management page.
Sign In: Log in with your Apple ID credentials.
Manage Subscriptions: Once logged in, navigate to the 'Subscriptions' section.
Find the Subscription: Select the subscription you wish to cancel.
Cancel and Confirm: Click on 'Cancel Subscription' and confirm your cancellation when prompted.
Troubleshooting Common Issues on Canceling Apple Subscription
Experiencing issues while trying to cancel an Apple subscription can be frustrating. This guide offers straightforward solutions to the most common problems, ensuring a hassle-free cancellation process.
Identifying and Solving Common Cancellation Problems
Unable to Find the Subscription: Sometimes, your subscription might not be immediately visible. Ensure you're logged into the correct Apple ID. Visit your account settings and check under 'Subscriptions' to find the one you want to cancel.
Cancellation Option Not Available: If the cancellation option is missing, it could be due to various reasons. Check if your subscription is billed through a third party, like an app or another service. In such cases, you’ll need to cancel directly through that service.
Error Messages During Cancellation: Occasional errors can occur due to network issues. Try restarting your device or switching to a different internet connection. If the problem persists, it might be a server-side issue at Apple's end.
Refund Issues: After cancellation, if you believe you’re eligible for a refund but haven't received one, review Apple’s refund policy. Remember, not all subscriptions are eligible for refunds after cancellation.
Seeking Further Assistance from Apple Support
If you've tried the above steps and still face issues, reaching out to Apple Support is the best course of action. Here’s how you can get in touch:
Online Support: Visit Apple's official support website. Here, you can chat live with a support agent, schedule a call, or find detailed articles for self-help.
Phone Support: Apple offers phone support in various languages and regions. You can find the appropriate phone number for your region on their website.
In-Store Assistance: For personalized help, visit your nearest Apple Store. Make sure to book an appointment in advance through the Apple Store app or website to avoid waiting times.
By following these steps, you can effectively troubleshoot common issues related to canceling your Apple subscription. Remember, Apple’s customer support is always there to help you through any complex problems or queries.
Post-Cancellation: What to Expect After You Cancel Your Apple Subscription
Cancelling an Apple subscription can raise many questions about the immediate aftermath. In this section, we'll guide you through what to expect right after you cancel your Apple subscription, covering crucial areas such as service access, data storage, and the possibility of refunds. Plus, we'll provide a straightforward process for re-subscribing, should you decide to return to the service.
Immediate Effects of Cancellation
Service Access: Once you cancel your subscription, access to the service will typically continue until the end of the current billing cycle. This means you can still enjoy the benefits until the subscription naturally expires.
Data Storage: Apple usually stores your data for a limited period post-cancellation. This is critical if you're considering re-subscribing later. However, it's advisable to back up any important data beforehand as policies can vary.
Refunds: Depending on when you cancel and the type of subscription, you might be eligible for a refund. Apple's refund policies can differ, so checking the specific terms of your subscription is recommended.
How to Re-Subscribe
If you change your mind and wish to re-subscribe to an Apple service, the process is straightforward:
Access Your Apple Account: Log in to your Apple account through the device or web.
Navigate to Subscriptions: Find the 'Subscriptions' section where you'll see a list of previous and current subscriptions.
Select the Service: Choose the service you wish to re-subscribe to and follow the on-screen instructions to reactivate it.
Remember, re-subscribing will often reinstate access to your stored data, if it's within the grace period set by Apple.
However, understanding what happens post-cancellation of an Apple subscription helps you make informed decisions and facilitates a smoother transition, whether you're leaving or pausing your service. And if you ever choose to come back, re-subscribing is just a few clicks away.
Alternatives to Canceling Your Apple Subscription
If you're considering canceling your Apple subscription, there are several alternatives that might suit your needs without completely cutting ties with the service. Here's a look at some options and a brief comparison with similar services.
1. Downgrading Your Subscription
Cost-Effectiveness: Downgrading to a lower-tier plan can save you money while still allowing you to enjoy some benefits.
Flexibility: Apple offers various subscription levels, so you can choose one that aligns with your current usage and budget.
2. Pausing Your Subscription
Temporary Relief: If you don't need the service for a short period, pausing your subscription can be a great option. Apple typically allows users to temporarily suspend their accounts.
Preservation of Preferences: By pausing instead of canceling, you retain your preferences and settings for when you resume the service.
Comparison with Similar Services
Variety of Content: Compare the content offerings of Apple with competitors like Spotify, Amazon Prime, or Netflix to see if they better meet your needs.
Pricing Models: Look at the pricing structures of these services. Some may offer more cost-effective plans or better value for money.
User Experience: Consider the user interface and experience. Services like Spotify are known for their personalized playlists, which might appeal more to music lovers.
Exploring alternatives like downgrading or pausing your Apple subscription offers flexibility and can be more advantageous than outright cancelation. Additionally, comparing Apple's service with its competitors can provide insights into what service best aligns with your preferences and budget. Remember, the best choice depends on your individual needs and usage patterns.
FAQs: Canceling Apple Subscriptions
1. How do I cancel my Apple subscription?
To cancel an Apple subscription, go to your iPhone's Settings, tap your name, and then choose 'Subscriptions'. Here, you'll see a list of all your active and expired subscriptions. Select the subscription you want to cancel and tap 'Cancel Subscription'.
2. Can I cancel my Apple subscription from my computer?
Yes, you can cancel Apple subscriptions from your computer. Open iTunes, sign in with your Apple ID, click on 'Account' from the menu bar, and select 'View My Account'. Scroll down to the 'Settings' section and click 'Manage' next to Subscriptions.
3. What happens after I cancel my subscription?
After canceling, you will still have access to the subscription until the end of the current billing cycle. After this period, you won’t be charged, and you'll lose access to the service.
4. Will I get a refund after canceling?
Apple generally does not issue refunds for subscription cancellations. However, if there’s a valid reason like an unauthorized purchase, you can contact Apple Support for assistance.
5. How do I turn off auto-renewal for Apple subscriptions?
To turn off auto-renewal, follow the steps to cancel your subscription. By canceling, you're effectively turning off the auto-renewal feature.
6. Can I reactivate a canceled subscription?
Yes, you can reactivate a canceled subscription. Go to your account settings, find the subscription, and select the option to resubscribe.
7. How do I check my subscription history?
To view your subscription history, go to your account settings on your Apple device or via iTunes on your computer. Look for the 'Subscriptions' section to see your active and past subscriptions.
Conclusion
In summary, effectively managing your Apple subscriptions is crucial for maintaining control over your digital expenditures. By carefully reviewing and, if necessary, canceling subscriptions, you can ensure that you're only paying for services that you truly use and value. This proactive approach not only helps in decluttering your digital life but also in achieving better financial management.
We highly encourage our readers to periodically review their Apple subscriptions. This simple yet effective habit can lead to significant savings and a more organized digital experience. Remember, your subscriptions should always serve your needs, not the other way around. Stay informed, stay in control, and tailor your digital subscriptions to fit your lifestyle.


